

In this tutorial I am going to show you how to make these pretty tissue paper flowers out of vintage sewing patterns. (Your patterns don't have to be vintage, but that is what I had on hand when I made these! Plus they are quite cheap, it seems the uglier that the vintage patterns are, the cheaper they are, which is just perfect if you are going to repurpose them into something else instead of using them to sew your hubby a brand new leisure suit with bell bottoms!)
These flowers are super easy to make and there are several tutorials out there already... I think I might have first learned how to make these about 3 or 4 years ago from Martha Stewart or somewhere... But just in case you haven't seen a how-to before here is my version of it!
All you'll need for these flowers is the following:
Scissors
Tissue paper (mine is a vintage pattern!)
Florist wire
Buttons (Vintage shell and mother of pearl ones are what I used!)
Glue
pliers
First you'll need to cut 4 layers of paper about 4 inches (10 cm) wide by about 8 inches (20 cm) long like this:

Stack the sheets of tissue paper and then starting on one of the short ends begin making small accordion pleats (each of my pleats is about as wide as my finger, doesn't have to be exact just make them about the same) like this:

Once you have the whole stack of paper pleated then cut a length of wire and fold over the middle of the pleated paper and twist it up firmly to hold the paper like this: (by the way that is what I use the pliers for, to grasp the wire and twist it firmly around the folded paper)

This picture actually shows 2 steps... after the wire is twisted around the middle of your paper, you can take the scissors and make the ends of your paper into petal shapes. Sometimes I make them rounded and sometimes I make them pointy and triangular. Both end up pretty!
Next you need to begin separating the layers of tissue paper. Unfold one end of your flower and begin to carefully separate the layers of petals. Be careful this paper tears easily! (guess how I know that?!) After you finish with one side turn it around and do the other side the same way!


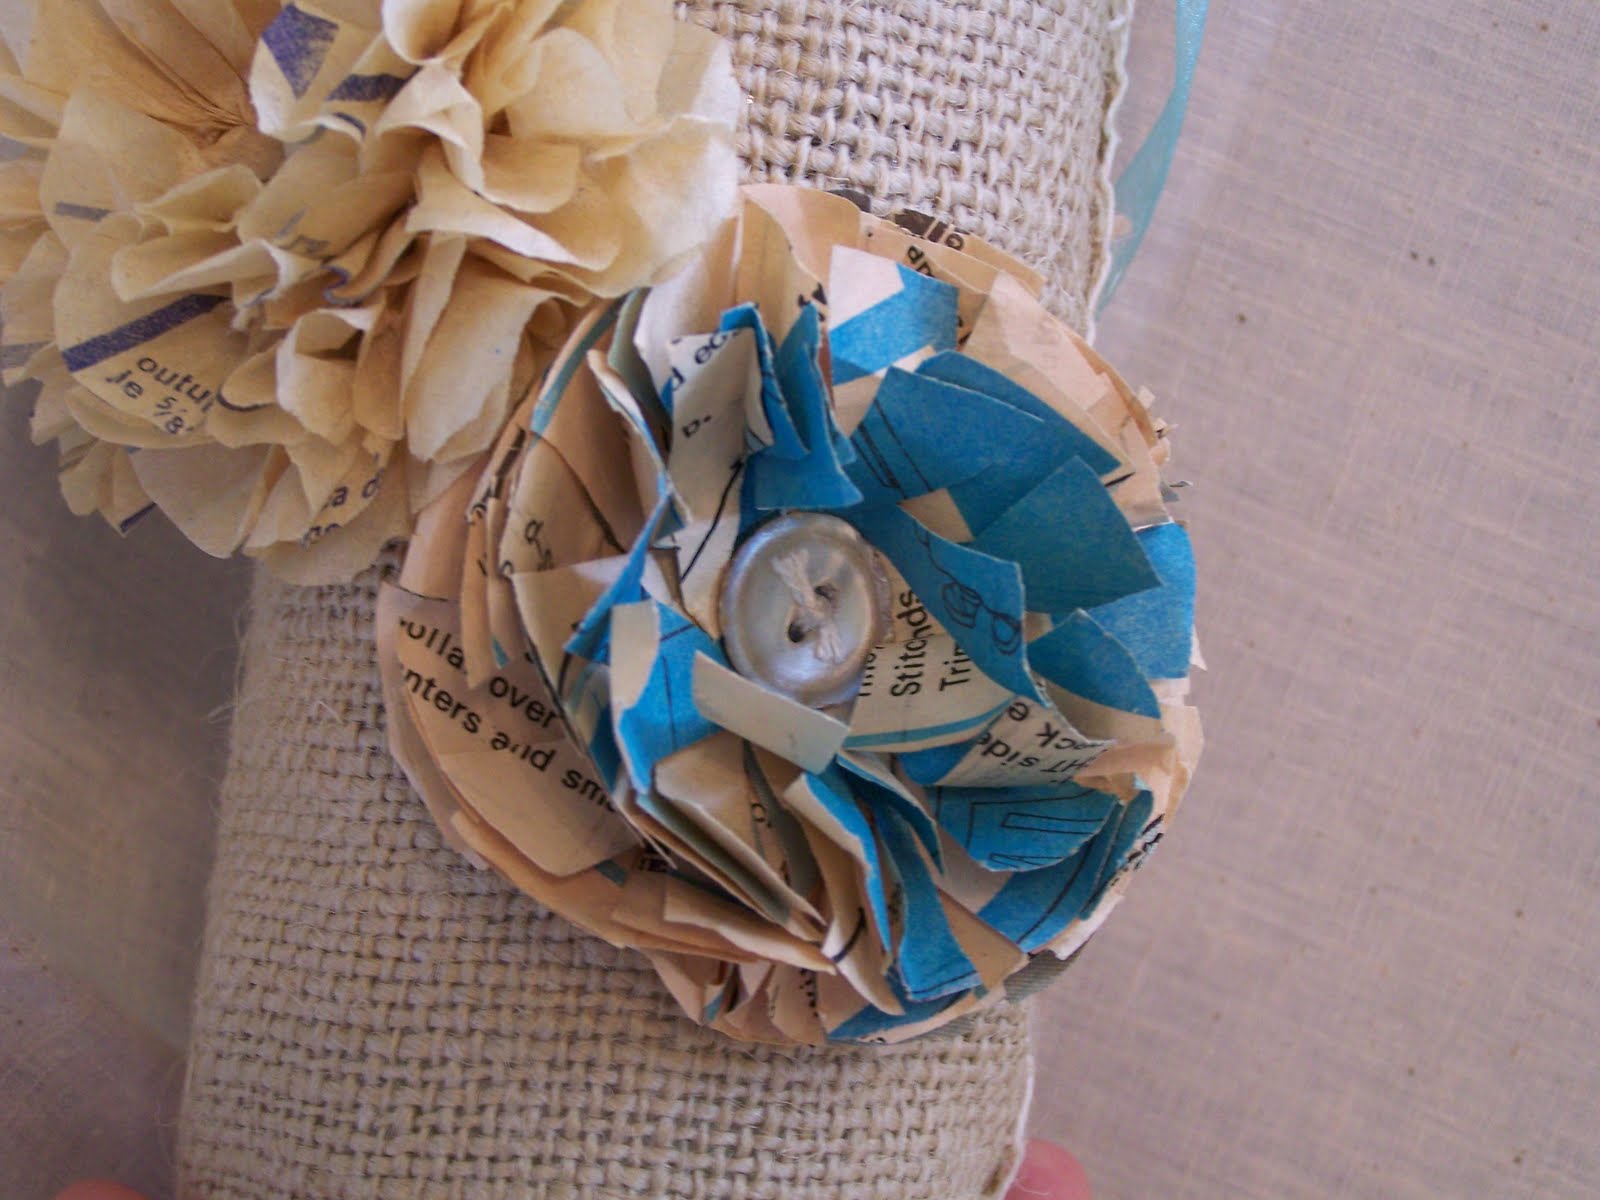
OK for this next step I don't have a picture. Sorry I thought I took a couple so I could choose from the best one and there weren't any there of this step when I downloaded them... hmm. Now your flower should look very fluffy like a paper pompom. You can leave it just like that or you can take it one step further and find the center of the flower where the wire is wrapped around it. Place your thumb there on the top of the wire, and find the very bottom where the wire pokes out of the base of the flower. Carefully smoosh those two sides together (Isn't smoosh a fun word?!) The center of your flower should flatten out quite a bit and you will probably need to re-tighten the wire stem, by twisting it some more. Once the center has been flattened some you can add a button like I did on this flower:
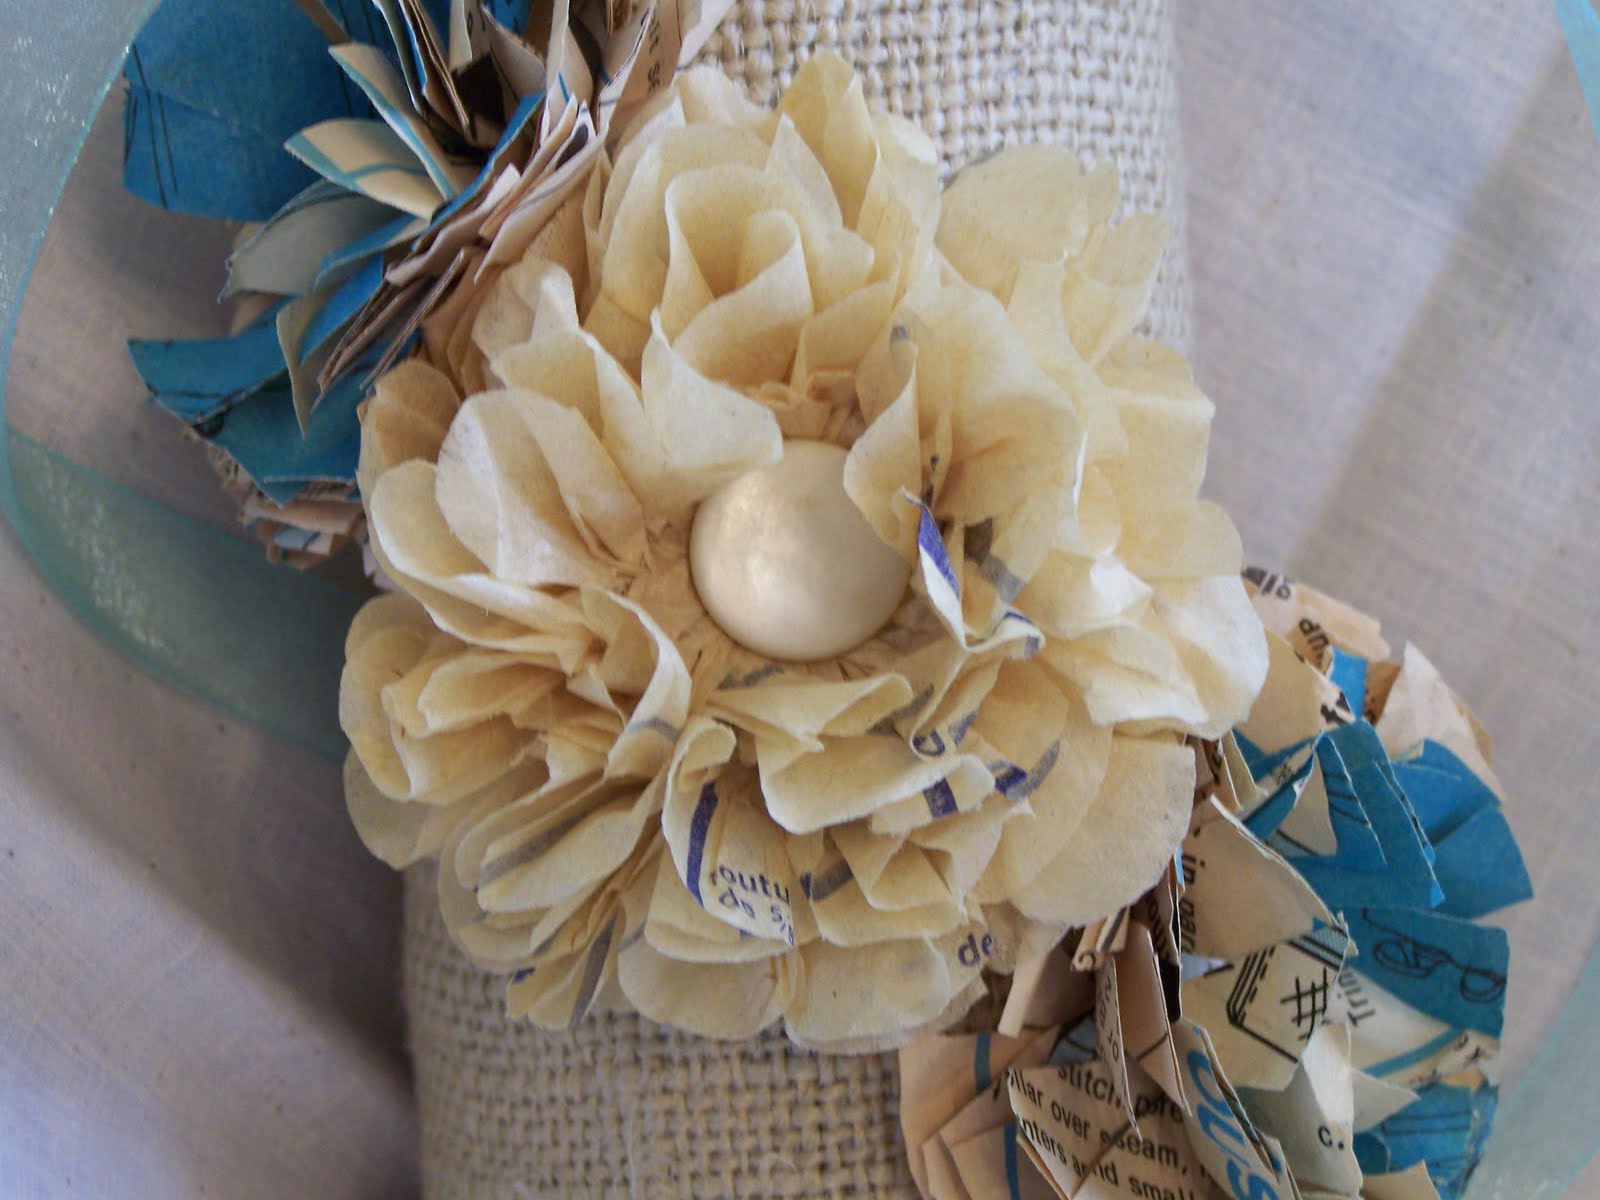
The button is a shank button that I just glued on using bead and jewelry glue, but any strong clear drying glue should work fine.
Here are some pictures of other flowers I've made using the same technique. The last picture shows one with pointy petals instead of round cut petals.


WOW!!! This is so cool, cheers Marie
ReplyDeleteThose are so cute! I love the ways you've used them too.
ReplyDeletecreative and beautiful!
ReplyDeleteWhat a great idea for pattern paper!
ReplyDeleteYou should come link this up at Making It With Allie!
Allie
AllieMakes.Blogspot.com
This is such a pretty idea. I may have to try this next time I give a gift to one of my friends who sews.
ReplyDeleteHi! I stopped over here from "Skip to my Lou"
ReplyDeleteThese flowers are awesome! What a great idea!
So glad I popped over ~
Maria
If you attach a stem, how do you do it?
ReplyDeleteHonestly, I've never attached a stem to them. So I'm not sure how I would right now. If you do so I'd love to see how you do it! ~ Rachel
Delete